Installation list
| Name | Quantity | Name | Quantity |
|---|---|---|---|
| MDVR equipment | 1 | MDVR 485 IO harness | 1 |
| Remote controller | 1 | Display | 1 |
| Network cable | 1 | AHD video adapter cable | 2 |
| PTZ | 1 | Control keyboard | 1 |
| Relay | 1 | Common wiring tools | n |
Necessary instructions
- For IPC PTZ, the IP address of the movement, the authentication user name and password must be known, which are usually stated on the PTZ label
- Here we take the common MX-AHDX-TA4 T-type PTZ and MX-KBC-02-A (with screen) 485 control keyboard as examples. The connection steps for other PTZs are similar. If you use a control keyboard without a screen, you do not need to connect the MDVR CVBS screen output to the control keyboard and directly insert it into the CVBS display
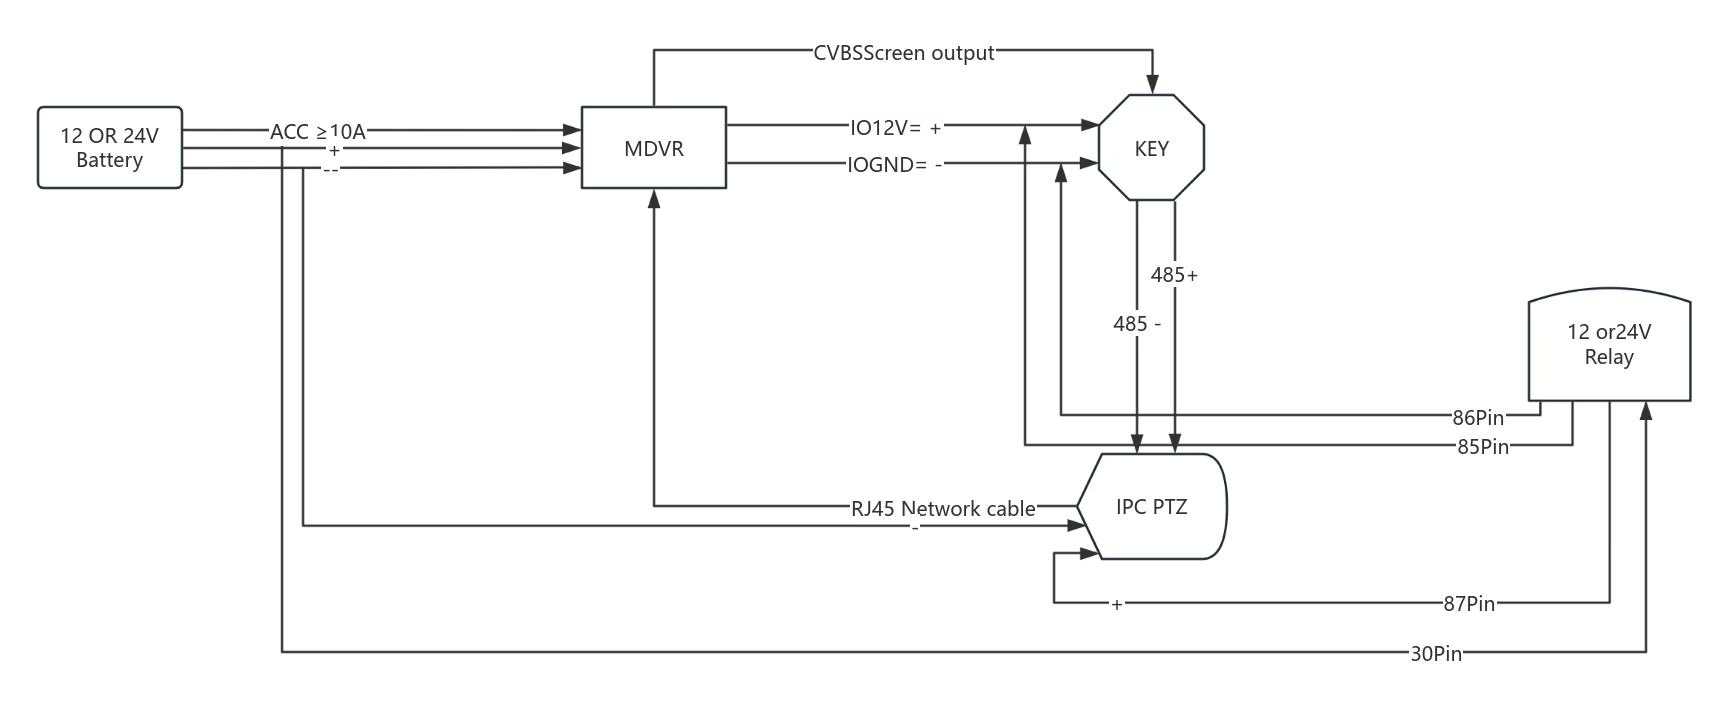
- Method 1 and method 3 send control commands through 485 line, method 2 and method 4 send command control through network port onvif
- There are four common scene wiring methods, method 3 is recommended to use four-way relay solution, the relay solution is selected according to the vehicle voltage 12 OR 24V vehicle
- Relays are recommended to use our matching delivery of two models MX-RLY-12-40 (12V5-pin 40A relay), MX-RLY-24-40 (24V5-pin 40A relay)
| Wiring method | Power supply | Car | PTZ | Control keyboard | Relay | Advantages and disadvantages |
|---|---|---|---|---|---|---|
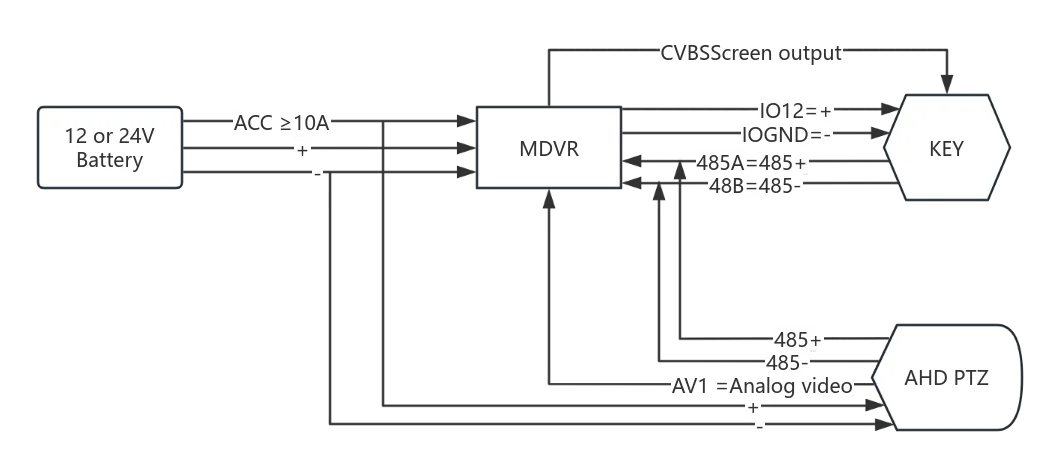
| Method 1 | 12 or 24V battery | MDVR | AHD PTZ | Control keyboard | ACC will shut down the PTZ immediately | |
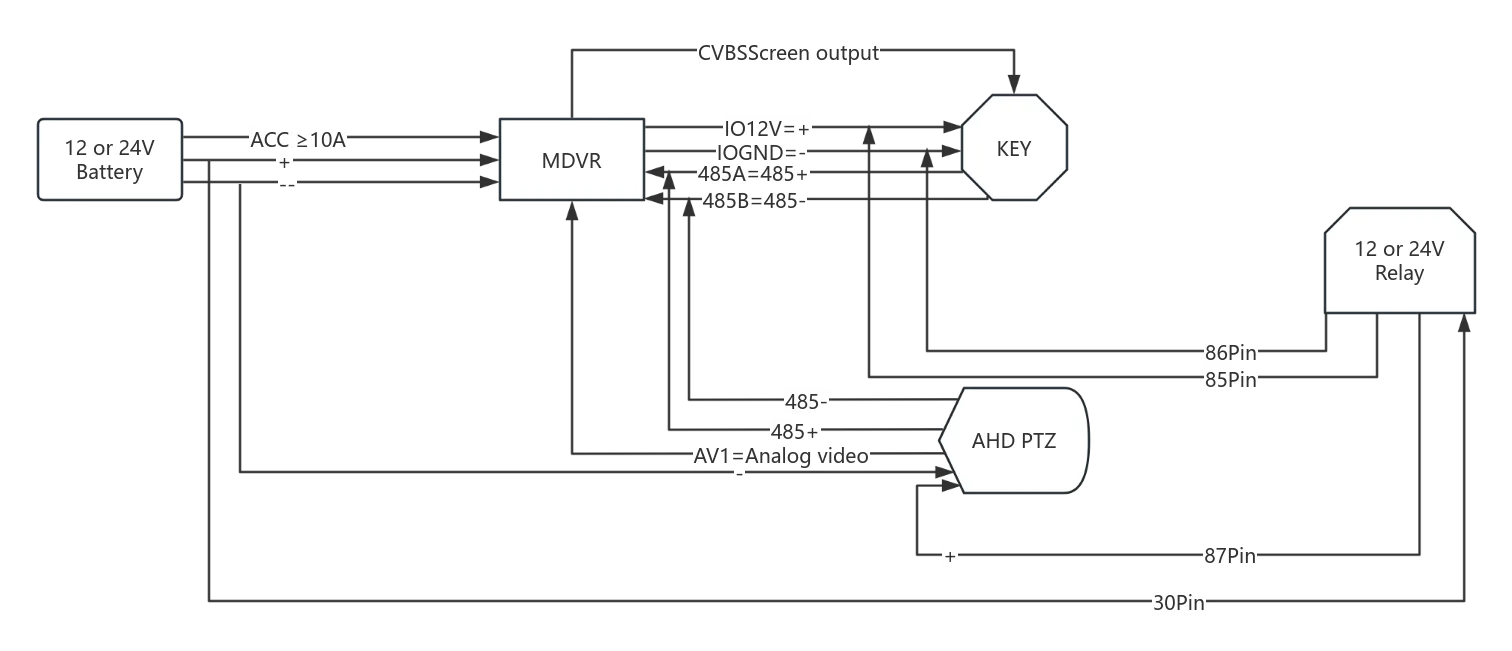
| Method 2 | 12 or 24V battery | MDVR | AHD PTZ | Control Keyboard | Relay | The PTZ will still work after ACC is turned off, but please be careful to configure the ACC delay time. Too long will drain the battery |
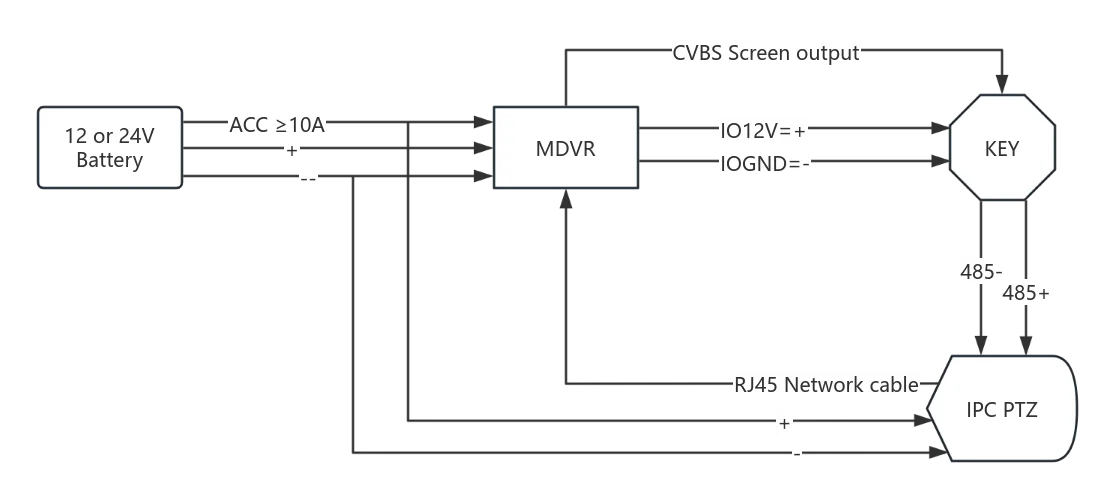
| Method 3 | 12 or 24V battery | MDVR | IPC PTZ | Control Keyboard | The PTZ will shut down immediately after ACC is turned off | |
| Method 4 | 12 or 24V battery | MDVR | IPC PTZ | Control Keyboard | Relay | The PTZ still works when ACC is turned off, but pay attention to the configuration of ACC delay time, too long will drain the battery |
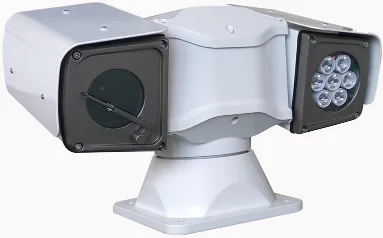
Actual picture:
Operation steps
1. Wiring
Choose a scene wiring according to the actual scene and the style purchased, refer to the following four wiring diagrams and configurations:
Method 1
Method 2
Method 3
Method 4
2. Device menu configuration
Method 1/2
1 Remote control enters Menu >> Settings >> Serial Port Settings >> Serial Port, configure serial port index RS485, serial port function PTZ, protocol type type1, baud rate 2400, other parameters are default, confirm and save.
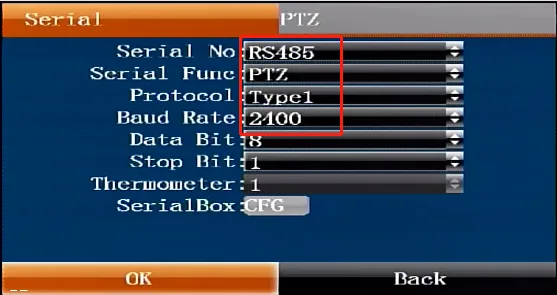
ps: The default baud rate of this model is 2400, address 1, and protocol PEL-D. For specific parameters, please refer to the manufacturer's PTZ documentation to confirm the baud rate, stop bit and other parameters defined by the dial code
2 Press the remote control back button to move to the right PTZ menu, move to channel 1, select PTZ address 1, protocol as Pel-D, confirm to save and restart to take effect.
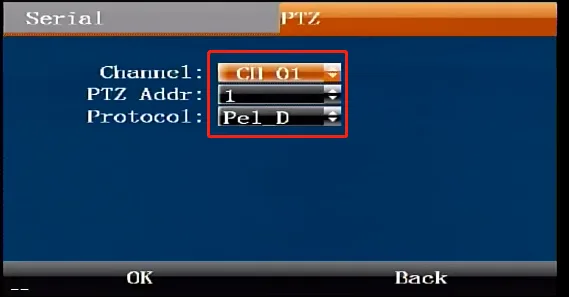
ps: Selecting channel one configuration here means that you can use the remote control to zoom in on channel one to enter the PTZ control pan/tilt. Generally, the corresponding channel is configured according to the channel number of the pan/tilt screen on the device. You can also select other channels to control.
Method 3/4
1 Use the remote control to enter Settings>>Recording Settings>>Recording Menu, check the Enable IPC checkbox, press the IPC Settings button to select the number of IPC cameras, enter the IPC camera connection authentication username and password, and the movement IP, and confirm to save.

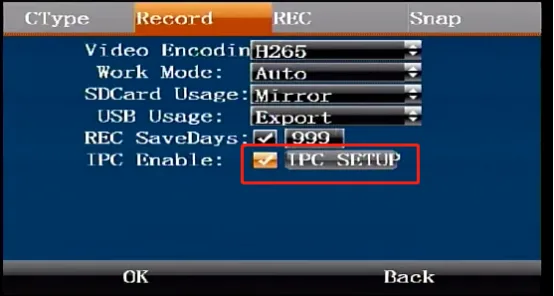
2 Press the return button on the remote control to enter Settings>>Network Settings>>Network Menu, move to the IP address bar to configure the IP and the movement IP in the same network segment but different IP, which cannot conflict with the movement IP, confirm to save and restart to take effect.

3. PTZ control test
1 After restarting, press the number 1 button on the remote control to zoom in on the PTZ screen channel (select the channel based on the actual AHD PTZ inserted into the device video input or the IPC PTZ configuration IPC screen), then press the PTZ on the remote control to enter the control mode, then press the up, down, left, and right keys to control the direction of the PTZ rotation, and press "ZOOM-" and "ZOOM+" to control the image zoom. 2 Control the rotation direction and image zoom through the keyboard