Prerequisites
Remote control configuration:
- Available remote control, normal display screen
- Matching Ethernet adapter cable, network cable
- Available IPC camera
Mxc_Config tool configuration:
- Matching Ethernet adapter cable, network cable, computer with Ethernet port
- Or the device has WiFi and is connected to the same LAN. The computer can ping the device WiFi IP address
- Available IPC camera
Note:
- You must first obtain the necessary information to connect and access the IPC camera:
Access the IPC camera IP address
The IPC camera supports and enables the onvif protocol. You can directly connect to the IPC camera through the computer and use the browser to access the IPC IP address to confirm
IPC camera onvif protocol authentication username and password. You can check the IPC camera label or ask the IPC manufacturer for information. If there is no such parameter, you can leave it blank
- The local network IP address of the device must be the same as the IPC camera The IP addresses are in the same network segment and do not conflict. The local network IP address of the device can be viewed through the remote control display or searched by the tool (the default IP of the device is usually 43 or 1 segment)
Operation steps
Use the remote control display menu configuration
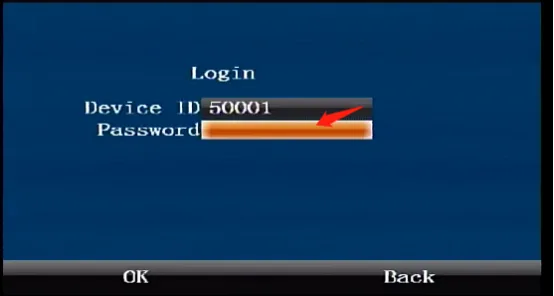
Press the remote control [ENTER] key to enter the login interface, enter the password "999999", and automatically log in to the main menu
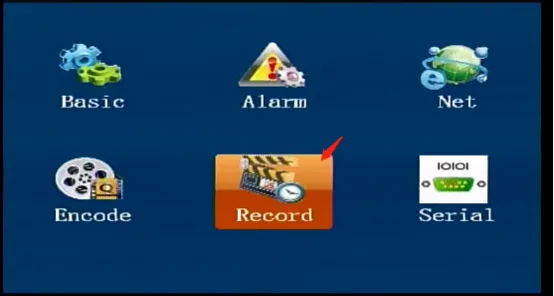
Select [Settings] on the main menu interface and press the "ENTER" key to enter the settings interface

Select [Recording Settings] in the [Settings] interface and press the "ENTER" key to enter the recording settings interface
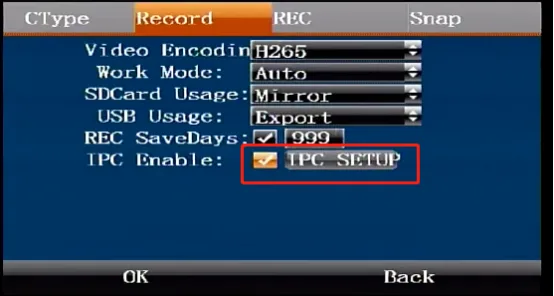
Check the Enable IPC checkbox in the [Recording Settings] interface
Select [IPC Settings] to enter the IPC settings interface. You can choose whether to enable the AHD+IPC camera hybrid mode, select the number of connected IPC cameras, enter the IPC camera connection authentication username and password, and enter the IP addresses of each IPC camera. Confirm that the save and restart will take effect.
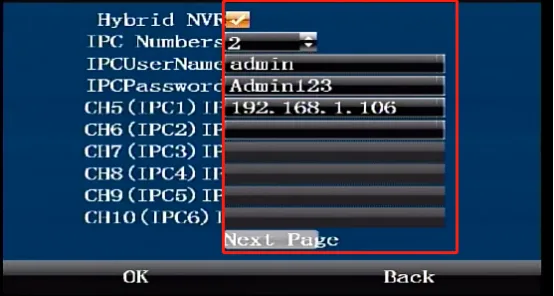
ps: If you need to connect multiple IPC cameras, please make sure that the access IP address of each IPC camera is in the same IP segment, such as 192.168.1.100, 192.168.1.101
Configure using Mxc_Config tool
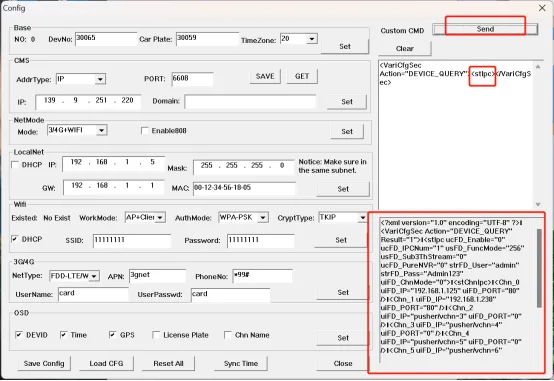
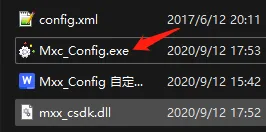
Click to download MmxConfig configuration tool, unzip and install, then click "Mxc_Config" Open the tool
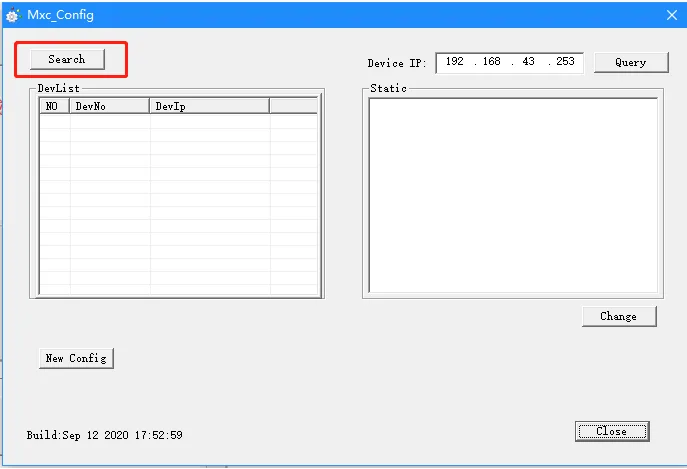
Click Search to search for devices in the LAN
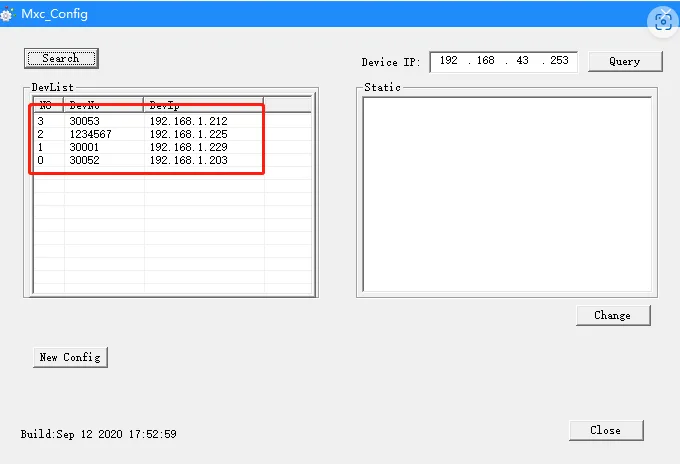
Click the device to be configured
Copy the following parameters in the input box to the computer. You can open and edit the corresponding fields in Notepad. The meaning of the fields can be viewed in the parameter notes below. After modification, copy the complete command to the tool input box. The parameter notes do not need to be copied. Click Send.
<VariCfgSec Action="DEVICE_SET"><stIpc ucFD_PureNVR ="1" ucFD_Enable="1" ucFD_IPCNum="4" strFD_User="admin" strFD_Pass="Admin123"><stChnIpc><Chn_0 uiFD_IP="" /><Chn_1 uiFD_IP="" /><Chn_2 uiFD_IP="" /><Chn_3 uiFD_IP="" /></stChnIpc></stIpc></VariCfgSec>
Parameter Notes: ucFD_PureNVR ="1" means pure IPC mode, 0 IPC+AHD mixed mode ucFD_Enable="1" means turning on the IPC function, 0 means turning off the IPC function; ucFD_IPCNum="4" means enabling 4 IPC channels; strFD_User="admin" Indicates that the user name admin is used to access the IPC; strFD_Pass="Admin123" indicates that the password Admin123 is used to access the IPC; Chn_0 uiFD_IP="" Fill in the corresponding IPC IP address here, Chn_0 indicates the image of the first IPC channel, Chn_1 indicates the second IPC, and so on
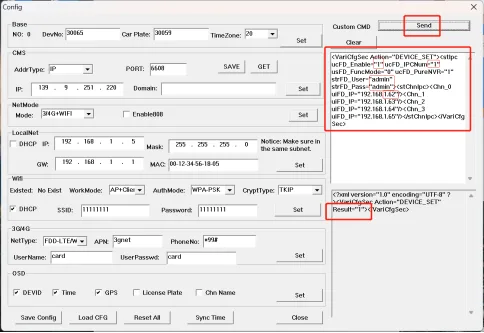
- Copy the query command below to check whether the IPC parameters just configured are successfully configured. After confirmation, restart the device to take effect.
<VariCfgSec Action="DEVICE_QUERY"><stIpc></VariCfgSec>