Prerequisites:
- The device can start normally;
- The remote control can be used and the display screen can display normally;
Troubleshooting method graphic description
Method 1 Connecting wires
1.1 Check whether the camera insertion port labeled "AV1" (AV1 represents the first channel camera, AV2 represents the second channel.) on the back panel of the device is inserted, tightened, and shaken without looseness. Check whether the male and female extension cables including the air conditioner are tightened, loose, oxidized, rotten, and have poor contact. As shown below:
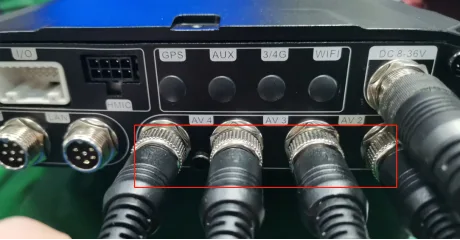
1.2 Check whether the wires from the camera insertion port on the back panel of the device to the camera position are broken or disconnected.
Method 2 Device parameters
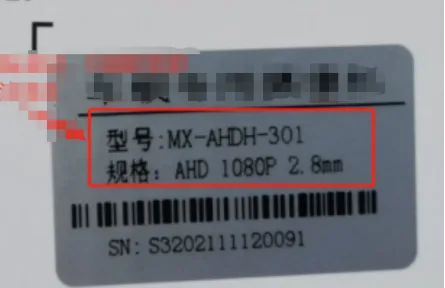
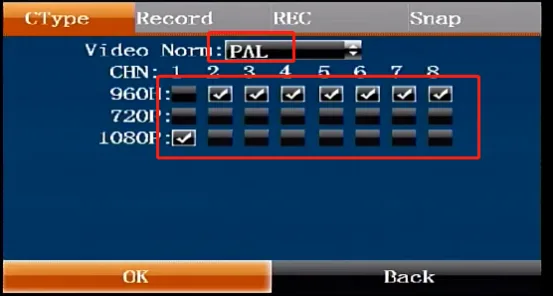
2.1 Connect the device to the display screen, press the Enter key on the remote control and enter the login password "999999" to enter the settings menuRecording settingsCamera menu Check whether the video format, channel resolution type and actual inserted camera parameters are consistent. The camera parameters can be confirmed on the label, packaging box, model or by asking the purchaser. If the parameters are incorrect, press the up and down keys to switch to change and save. As shown below
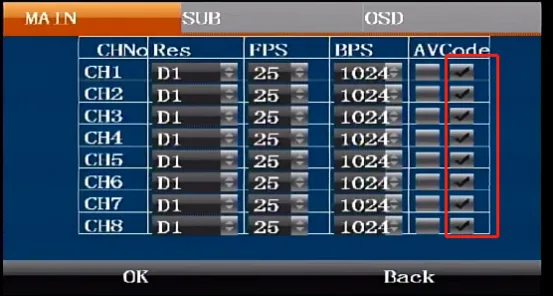
2.2 Enter the settings menu >>> Encoding settings >>> Main stream Check the last row of video checkboxes in the menu. If not enabled, press the key to move to the checkbox to enable and save. As shown below:
Method 3 Device power supply
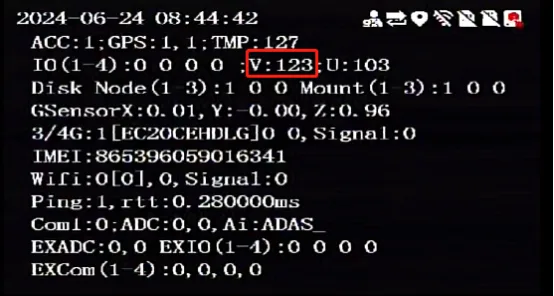
3.1 Connect the device to the display screen and press the remote control "LOGIN+.DOT" button at the same time to enter the test interface to check whether the voltage value of the second line "V" character is in the range of 8-36. As shown below:
3.2 Check whether the camera has infrared function. If it has infrared function, cover the light sensing area to see if the infrared function is turned on to prove that the camera is powered. As shown below:
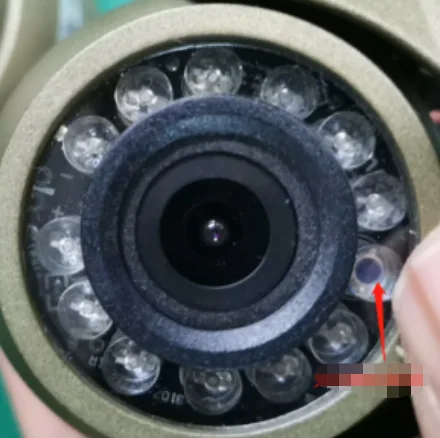
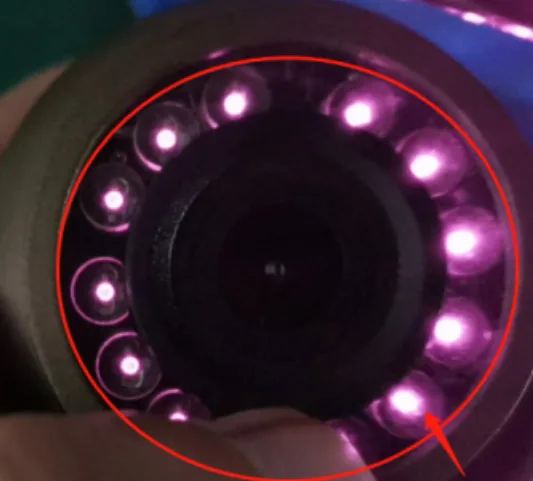
3.3 Unplug all other cameras, IO harness peripherals, hard disks, hand microphones and other peripherals that require power from the back panel of the device, restart the device to see if the camera can restore the image
Method 4 Camera quality
4.1 Device connected to the display Replace other cameras with normal images and the same specifications and parameters to this channel and directly insert them into the back panel to see if the image is displayed
4.2 Purchase a new camera with the same specifications and parameters and replace it with the back panel of the device to see if the image is displayed
After completing all the steps, if there is still no image, please contact our sales staff for after-sales and other related procedures