Prerequisites:
- The device network can access the Internet normally, for example: 4G dial-up is successful or wired network routing is successful or WiFi connection is successful, refer to "Function Usage">>>"Network Function" article introduction!
- Usable remote control, normal display screen
Operation steps:
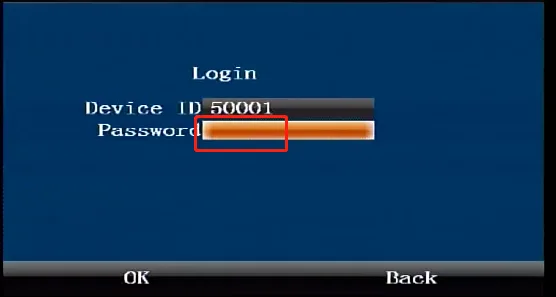
Press the middle "ENTER" confirmation button on the remote control to enter the login interface, and enter the default administrator password "999999"
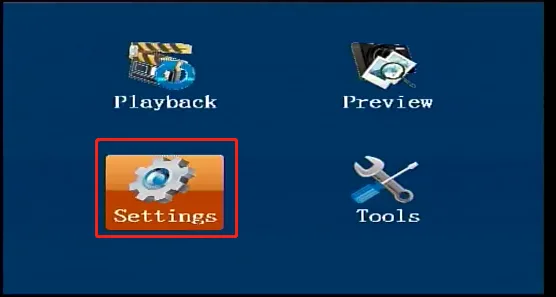
In the first-level menu interface, press the direction key on the remote control to move to the "Settings" button, and press the middle "ENTER" confirmation button on the remote control to enter the second-level "Settings" menu
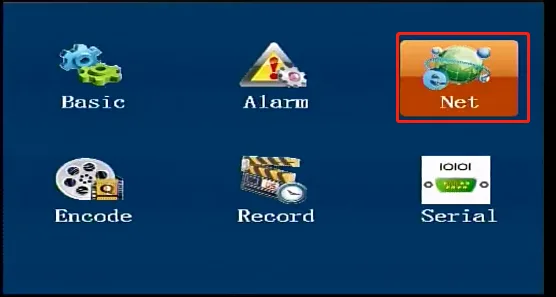
In the second-level "Settings" menu interface, press the right arrow key on the remote control to move to the "Network Settings" button, and press the middle "ENTER" confirmation key on the remote control to enter the third-level "Network Settings" menu
In the third-level "Network Settings" menu interface, press the right arrow key on the remote control to move to the "Center" interface, and press the middle "ENTER" confirmation key on the remote control to enter the "Center" menu modification status
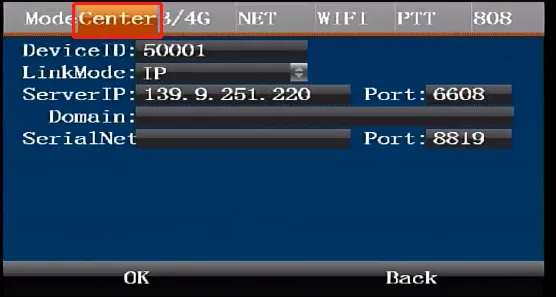
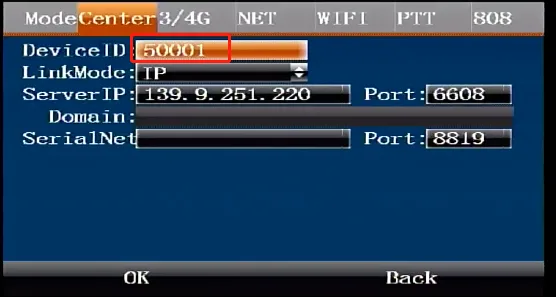
In the modification state, press the down arrow key to enter the "Device Number" input box and enter the registration platform device number. If the input is pure numbers, you can press the "del" delete key in the lower left corner of the remote control direction key to quickly delete the default number, and then press the number key to enter the device number
When the input device number is not a pure number, press the middle "ENTER" confirmation key on the remote control in step 5 to enter the "Input Characters" menu. The default interface is the lowercase English input character menu. Move the arrow keys to the English characters to be entered, and press the middle "ENTER" confirmation key on the remote control again to successfully enter the English characters;
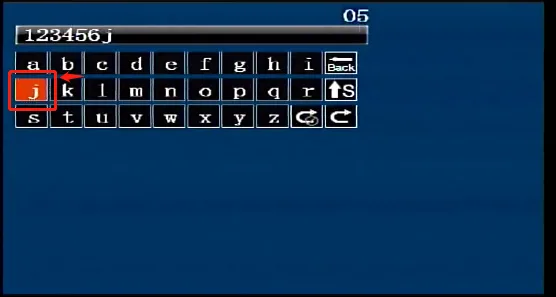
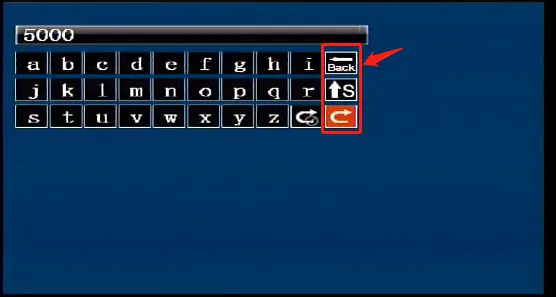
 Switch between numbers, letters and symbols. Move the cursor to this button and press "ENTER" to switch.
 Delete character button. Move the cursor to this button and press "ENTER" to confirm the deletion.
 Return button, move the cursor to this button and press "ENTER" to return.
Press the down arrow key to come to the "Connection method" box. The default IP connection registration platform is used. If a domain name registration platform is required, press the remote control "ENTER" confirmation key to switch the connection method domain name. Otherwise, skip to the next step
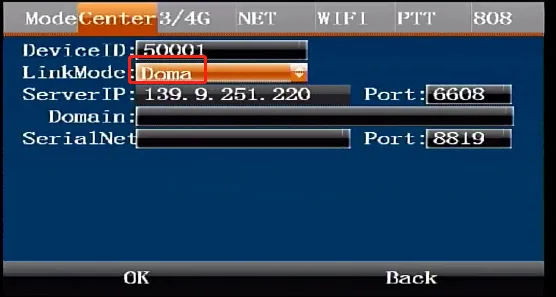
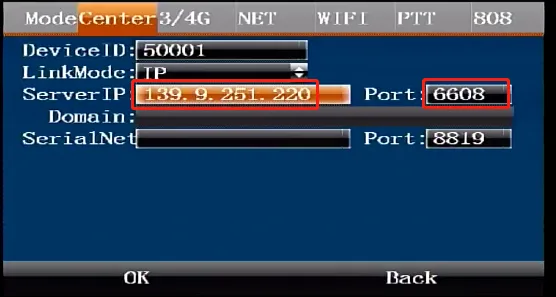
Press the down arrow key to go to the "Server IP" input box and enter the IP address according to step 5. Press the right arrow key to go to the "Port" input box and enter the port in the same way as step 5.
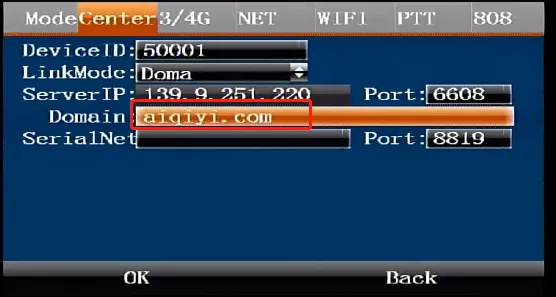
When switching the domain name registration method in step 7, press the down arrow key to go to the "Domain Name" input box and refer to step 6 to enter the alphabetic input menu to enter the domain name address
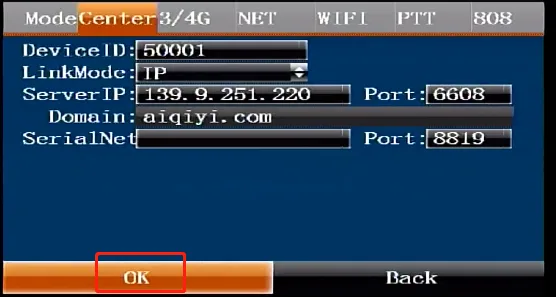
Enter "Device Number", "Port", "Server IP" or "Connection Method" After "Domain Name", press the down arrow key to move the cursor to the "Confirm" button and then press the "ENTER" key to save the parameters. At this time, the registration parameters for the private platform are completed.
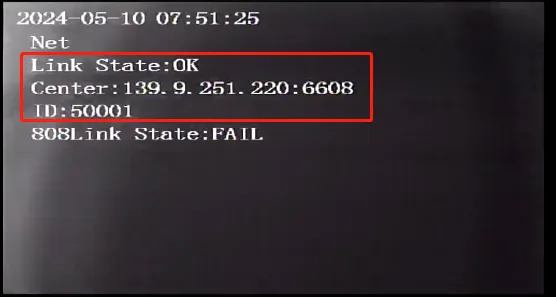
Press the "RETURN" return key in the lower right corner of the remote control direction key three times to come to the device real-time preview main interface, and press the right arrow key three times again to come to the "Network Status" interface to check whether the private platform is successfully registered.