Prerequisites:
- Display screen, remote control, supporting IO expansion cable (some models come with it)
Note:
- IO alarm linkage is based on the function of IO alarm input configuration. To use alarm linkage, you must complete the IO alarm input configuration. Refer to the above article - Configure IO alarm input
- To capture pictures and generate alarm videos, you need to insert storage media and identify them normally
- The image and alarm video upload here refers to registering the CMSV7 platform
Operation steps
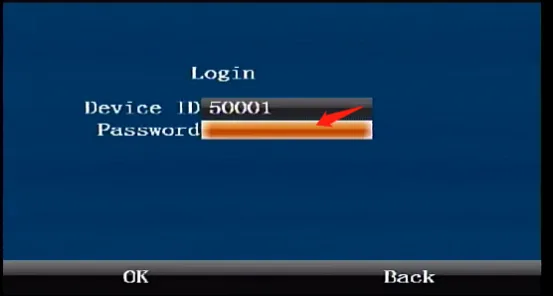
Press the remote control [ENTER] key to enter the login interface, enter the password "999999", and automatically log in to the main menu
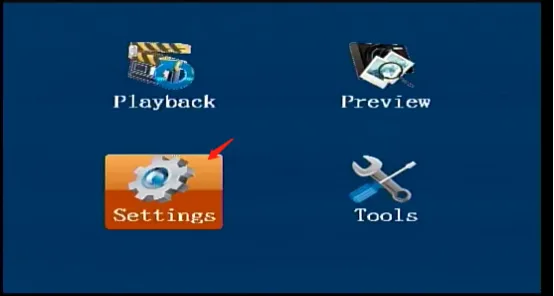
Select [Settings] in the main menu interface and press the "ENTER" key to enter the settings interface
 )
)
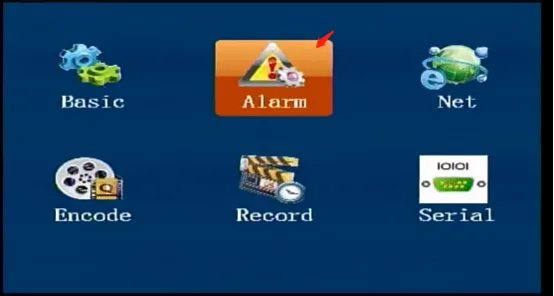
Select [Alarm] in the [Settings] interface, and press the "ENTER" key to enter the alarm settings interface
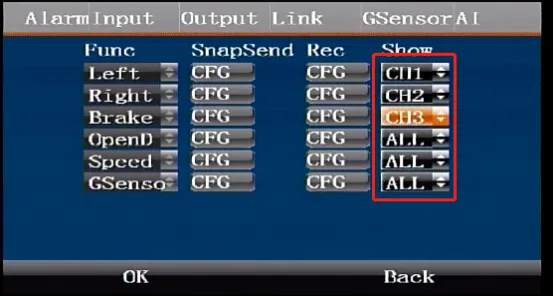
In the [Alarm Settings] interface, press the right arrow key to come to the [Link] interface, and press the "ENTER" key to enter the editing state. The left function is gray and cannot be changed. According to the function name configured according to the IO alarm input, press the down arrow key to move the snapshot upload button, and press the "ENTER" key again to enter the interface to check whether to capture and upload pictures, confirm to save and return.
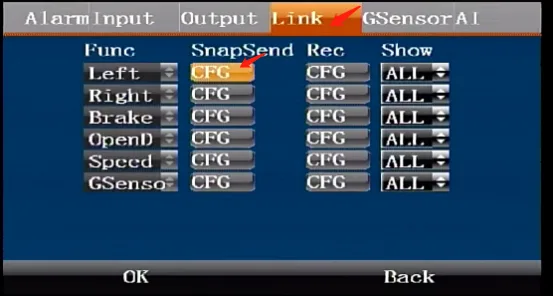
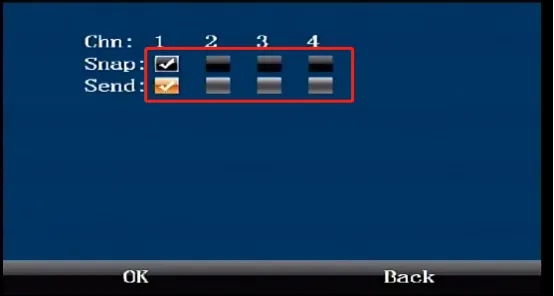
Press the right arrow key to move the video upload button, press the "ENTER" key again to enter the interface of checking whether to enable alarm recording and uploading video, confirm to save and return.
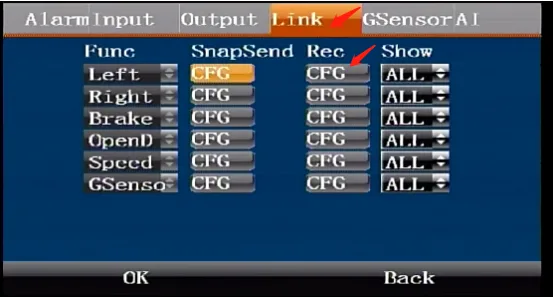
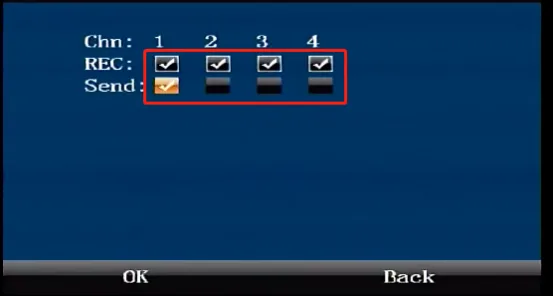
Press the right arrow key to move the display selection box and select the linked channel. When the alarm is triggered, the display will enlarge this channel. The default is to display all channels. Confirm and save to take effect.