Prerequisites:
- Display screen, remote control, supporting IO extension cable (some models come with it)
Description:
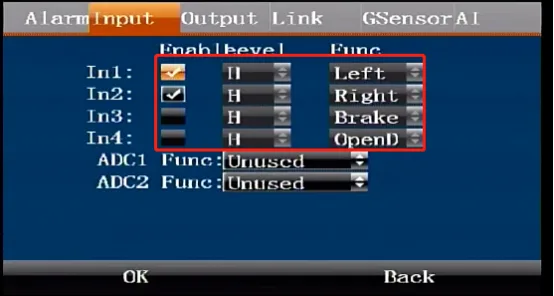
- Input 1: The white sensor in1 line of the IO extension cable, input 2 sensor in2. (refer to the interface status definition-back panel article above)
- Enable: which IO alarm input is turned on
- Level: whether the input level signal to the IO alarm line is high or low, H high level, L low level, the default configuration H high level when the input high level signal will trigger the alarm, the configuration L low level when the input low level signal will trigger the alarm, high level voltage range: 3.3
36V, low level voltage range: 03.3V - Function: what function the IO input line is connected to, for example, the left turn function line configured in IO1 should be connected to the vehicle left turn level signal line, and the IO linkage will be associated with this function linkage later.
Operation steps
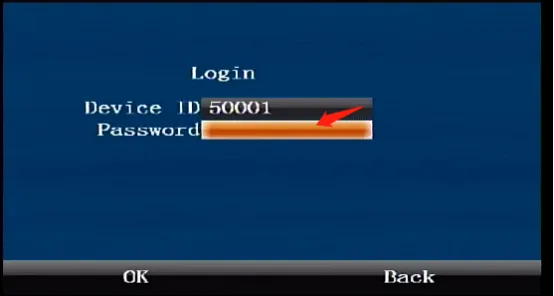
Press the remote control [ENTER] button to enter the login interface, enter the password "999999", and automatically log in to the main menu
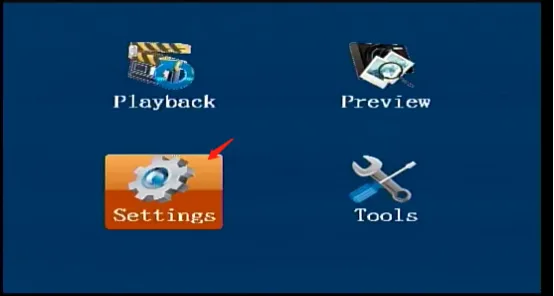
Select [Settings] on the main menu interface and press the "ENTER" button to enter the settings interface
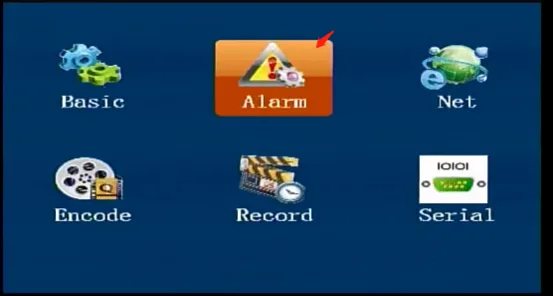
Select [Alarm] in the [Settings] interface, and press the "ENTER" key to enter the alarm settings interface
Press the right arrow key in the [Alarm Settings] interface to come to the [Input] interface, press the "ENTER" key to enter the editing state, press the down arrow key to move the Enable Recurrence box and press the "ENTER" key again to check Enable, move to the Level box to select high and low levels, and move to the Function to select the Enabled function. The other alarm input operations are similar, and confirm to save and take effect.