Prerequisites:
- A usable remote control and a normal display screen
- The device is already in shipping status (AI has been authorized and the algorithm has been imported)
Operation steps:
1. Login menu
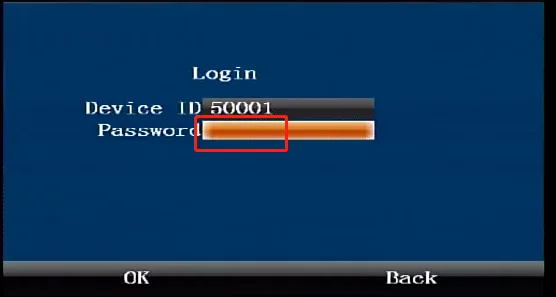
1.1 Press the middle "ENTER" confirmation button on the remote control to enter the login interface and enter the default administrator password "999999"
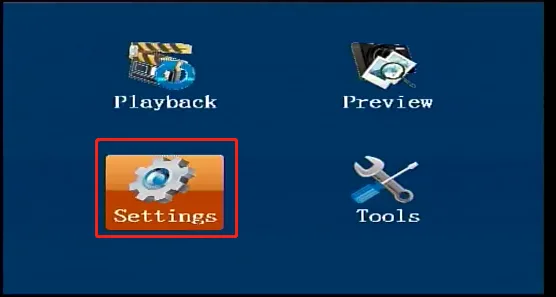
1.2 In the first-level menu interface, press the arrow key on the remote control to move to the "Settings" button, and press the middle "ENTER" confirmation key on the remote control to enter the second-level "Settings" menu
1.3 In the second-level "Settings" menu interface, press the right arrow key on the remote control to move to the "Network Settings" button, Press the middle "ENTER" confirmation key on the remote control to enter the third-level "Alarm Settings" menu
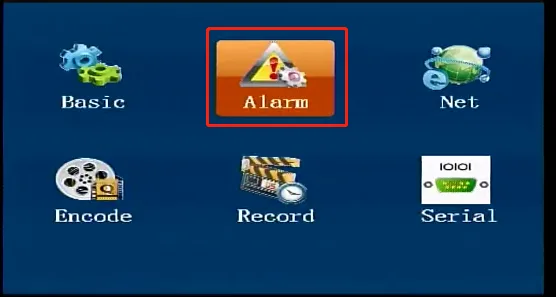
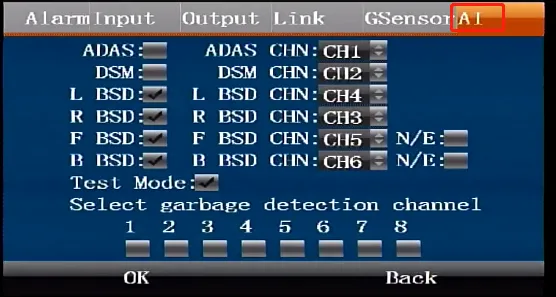
1.4 Third-level "Alarm Settings" menu interface Press the right direction key on the remote control to move to the "AI" menu, and press the middle "ENTER" confirmation key on the remote control to enter the "AI" menu modification status
2. Enable AI function
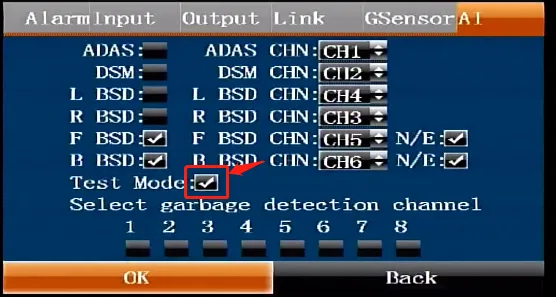
Active safety AI can enable the following functions: ADAS DSM L BSD (left BSD) R BSD (right BSD) F BSD (front BSD) B BSD (rear BSD)
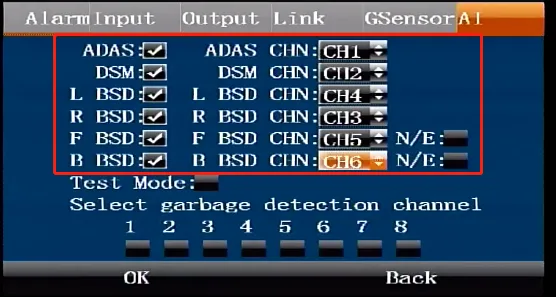
2.1 For example, if you need to enable ADAS function and associate it with CH1 channel, press the down key of the remote control ↓ to move to the ADAS checkbox, then press the confirmation key ↵ to check, press the right key → to move to the ADAS channel selection box and press the confirmation key ↵ to select the channel, the default is CH1 channel. You do not need to select the button here, and the method of enabling other AI functions is the same.
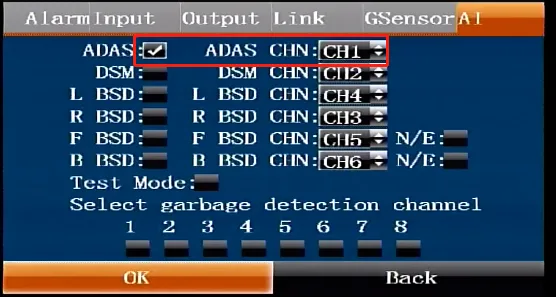
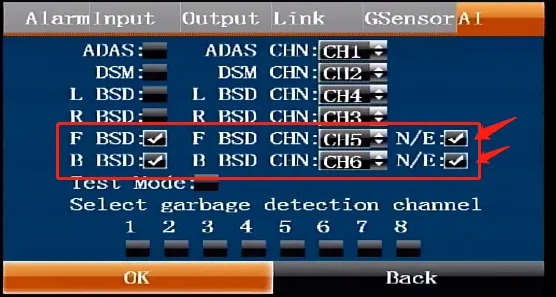
ps: The enabled AI functions cannot conflict when associated with channels, for example, ADAS is enabled and associated with CH1 channel & DSM is enabled and associated with CH1 channel. 2.2 Front BSD and rear B BSD support fisheye cameras. When using non-fisheye cameras for front and rear BSD, please check the N/E checkbox at the back to switch to normal camera mode. 2.3 Move to the "Confirm" button to confirm and save, and restart the device.
3. Check if AI is running normally
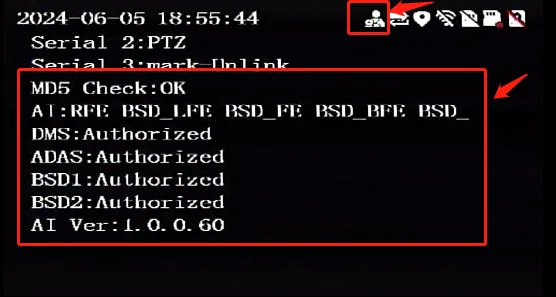
3.1 Check if the last human icon in the upper right corner is as shown in the figure below 3.2 The device is in the real-time preview main interface. If you press "RETURN" in the lower right corner of the remote control direction key in the menu interface to exit to the real-time preview main interface. Press the left button on the remote control ← to go to the "Serial Port, AI" interface, check whether the AI status in the red box in the lower left corner is running normally. If it is running normally, there should be the following information: 3rd line MD5 verification: Success 4th line AI: L BSD R BSD (AI function enabled) 5th line DMS authorized 6th line ADAS authorized ... authorized (authorized AI function) 9th line AI VER: 1.0.0.60 (AI algorithm version number)
4. Enable AI test mode
If you need to test the AI function without installing it in the vehicle, refer to "2. Enable AI function" above to enter the AI menu and check the test mode Check the box to save. If you need to restore the normal mode after loading, uncheck the box to save and restart the device.