Prerequisites:
- The device and computer must be on the same local area network (LAN) segment, and the computer must be able to ping the device's local IP address.
Steps:
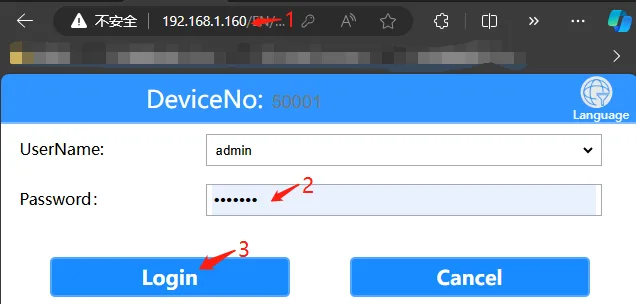
Open your computer's browser, enter the device's local network IP address, enter the login password "Adm_123", and click "Login". To view the device's local network IP address, refer to the article "Function Usage" >>> "Network Functions"
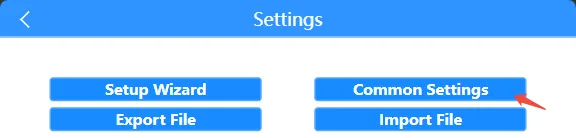
Click "General Settings" >>> "AI Settings" to access the Active Security AI function configuration interface
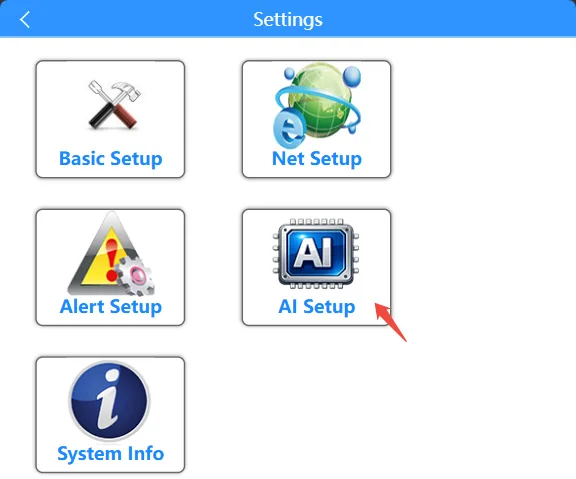
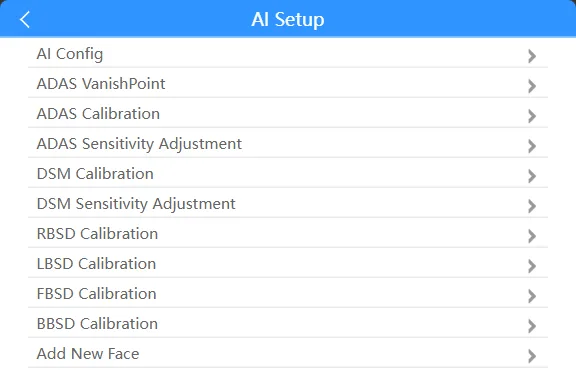
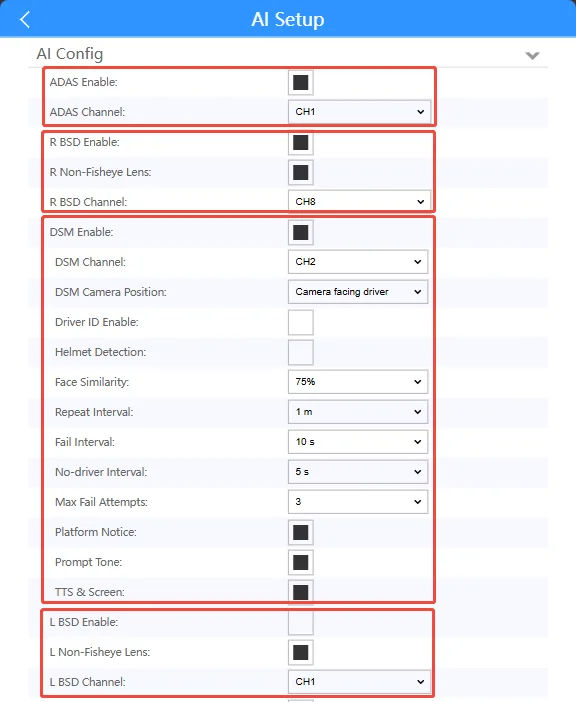
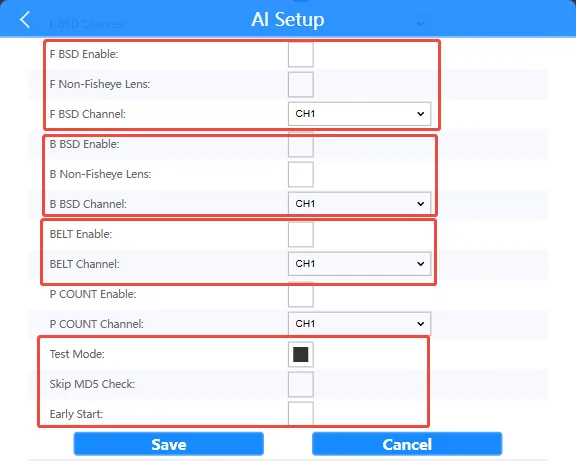
Click the "AI Settings" section. Here you can configure the following parameters: ADAS, RBSD, DSM, helmet, driver face recognition, L RBSD, F RBSD, BB RBSD function activation and associated channels, test mode, MD5 verification, advanced startup, etc. Configure and save as needed. For detailed function introductions, please refer to the article "Active Safety AI Local WEB Configuration".
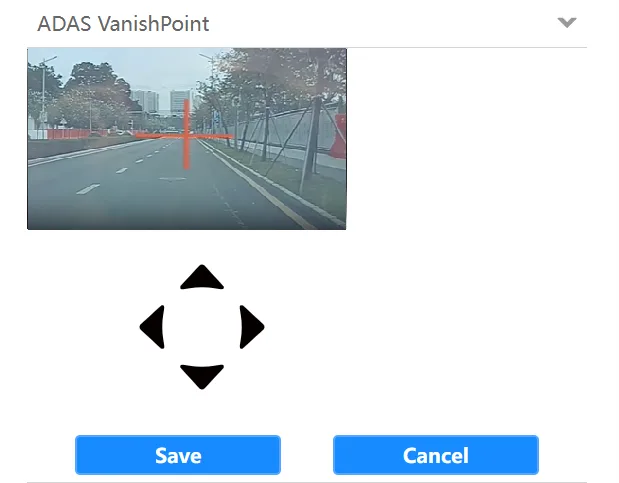
Click the "ADAS Extinction Point" tab; here you configure active safety. ADAS Vanishing Point Calibration Function: Use the arrow keys to move the red crosshair to the horizon line directly in front of the ADAS camera, then click Save to complete the vanishing point calibration.
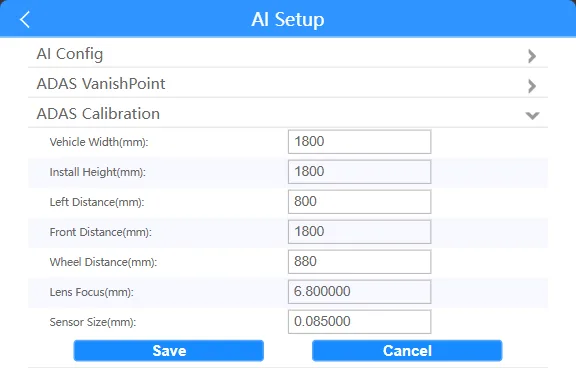
Click the "ADAS Calibration" tab. Here you can configure the calibration function for relevant parameters of the active safety ADAS camera. Enter the actual vehicle measurement data and save to complete the parameter calibration.
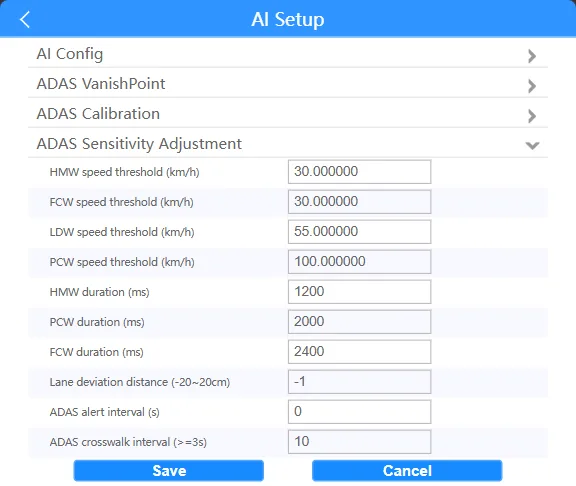
Click the "ADAS Sensitivity Adjustment" tab. Here you can configure the sensitivity thresholds and intervals for various types of alarms in the Active Safety ADAS.
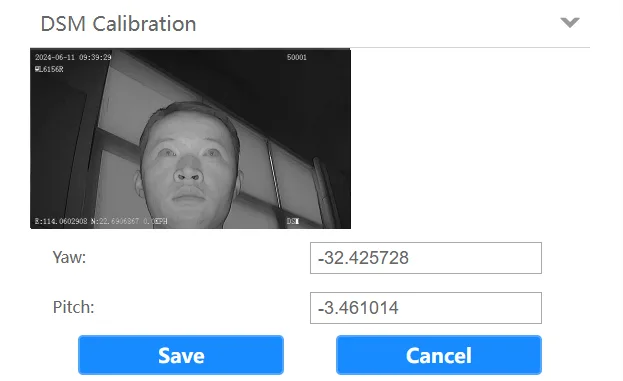
Click the "DSM Calibration" tab. Here you can configure the Active Safety DMS calibration function. The driver should adjust the calibration according to their usual driving posture. Look straight ahead and click Save to complete the calibration.
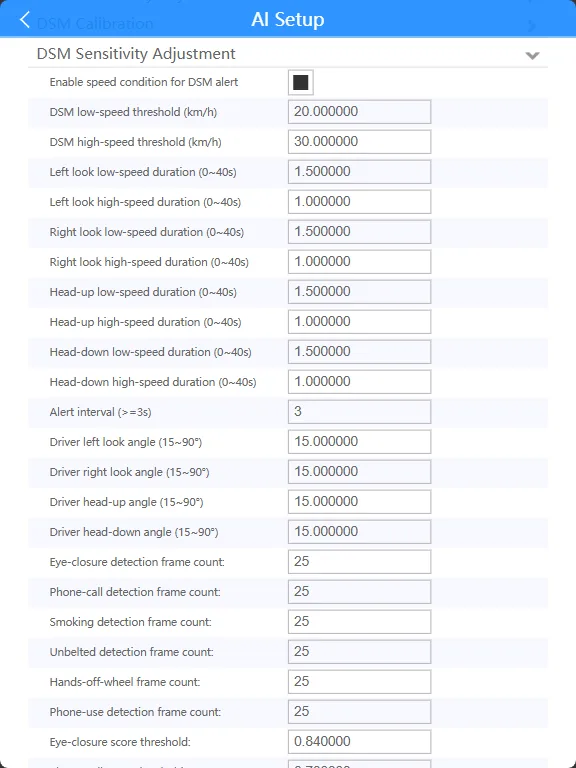
Click the "DSM Sensitivity Adjustment" tab. Here you can configure the sensitivity thresholds and intervals for various types of alarms in the Active Safety DMS.
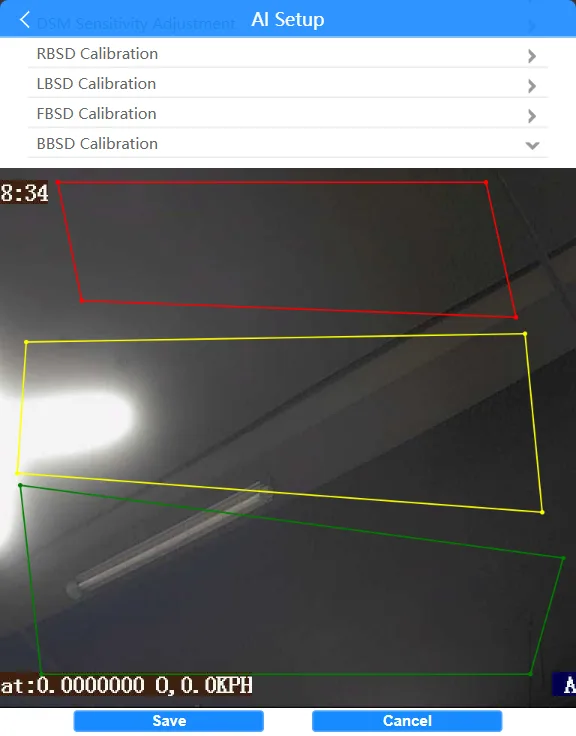
The four columns below, "Right BSD," "Left BSD," "Front BSD," and "Rear BSD," configure active safety BSD-related calibration functions. They are divided into three area levels. Click the four corners of the lines to drag the squares and adjust them to the desired frame area. Click "Save" to complete the calibration.
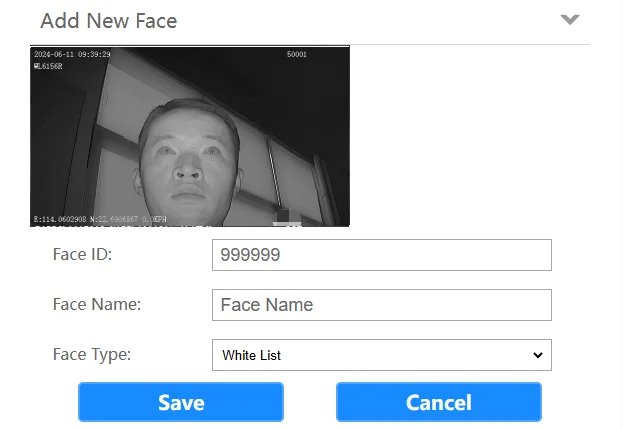
Click the "Add New Face" column. This is used to add faces for the driver face recognition function, which is used in conjunction with the first item, "AI Settings" >>> "Driver Face Recognition." The driver's face is determined based on their usual driving posture. Look straight ahead and click Save to complete adding your face.